Antiques, crafts, design, diy, girly, home, home decor, Style

If I was famous and had a “life and style” magazine segment…

I’m going to be saying goodbye to my recondo (Redondo Beach Condo); which I have called home for the past 5 years.  I’ve had a blast putting my touch on every wall and I’m sad to say goodbye.  Before selling, I asked my little sister Chanie (Amie…not related…but the closest thing I have to a little sis) to take some pics of the place, just so I could have them.  She captured it perfectly and I’m in love with the images.  She also got some of me and Tawnie…my 9 year old Yorkie (who I bought with my first paycheck as a teacher)!  There were about 422….but here are just a few.

First is my living room.  I spent about 16 hours painting that chevron wall….well really the most time consuming part was the taping!

living room collage

living room collage 2

One of the best parts about living in Redondo is the proximity to the pier…I loved throwing Tawn in the back of my bike and riding at the beach.  She loved it too!

bike

I bought these hanging globes from CB2 and made these terrariums using air plants…super low maintenance!

corner nook collage

I was really into the Chevron trend for a while…as you can see!  This wall was super fun.  What was not fun was when a plumber knocked on my door and said there was a leak behind my shower and had to cut out a 10×20 inch chunk out of my hard work….and then proceeded to LEAVE THE HOLE.  Thank God for my rent-a-husband Danny who came in and patched the drywall.  Don’t know what I would do without the Richards family…..they take care of me for sure.  I never did get around to repainting that spot…

bathroom collage

The composition of the pic is fun.

curling-hair

I love the dining area.  Those are three mirror doors that slide and conceal a large storage closet.  I painted them with gray chalkboard paint and covered the center with paper wall tiles.  Super easy to install!  One of my favorite pieces in the house is the chandelier I fashioned using vintage cage lamps and light coverings found at a flea market.

dining room room collage

And last…here’s my bedroom/craft room.

fav-bed-edited-filter

bedroom collage 1

desk collage

jars

record-wall

sideboard collage

Standard
crafts, design, diy, home, home decor

highlight your favorite things!

 I made a marquee y’all!

17-marquee final product

I’ve been wanting to buy a marquee for a long time and have seen many takes on the retro sign decor idea. I love the use of upcycled letters from signs…take a look at the los vegas neon museum here…or google “las vegas sign graveyard.” AMAZING right? Anywhoo…those are really really big and even more really expensive. Go onto etsy and you’ll find that a single letter will run you about $100. That ish cray. Coming from a girl with a “I can do that” mentality I decided to try to do it myself. The question was…how can I make this happen on a budget? I saught out alternative options such as this option where the JunkArtGypsyz use 16″ laser cut wood and install lights or this option from one of my favorite blogs with pre-made 12″ cardboard letters. The wood and cardboard letters are accessible at the craft store but I really had my heart set on metal letters. I ran across 16″ aluminum letters by Danny Seo at Marshalls. Each letter ran me 12.99. Deal! I wasn’t so much into the color…but the bones for my project were there.  The only limitations were…I had to pick letters I could flip around…such as I Y O M A C V W T U E.  Try making words out of those letters! haha.  The K didn’t flip perfectly, but good enough.  You’ll see when I post how I’m decorating with these why I chose the word “CAKE.”  Runner up option was HOME but that wasn’t as fun!

Here is a pic of the letters before I got to work on them:

1-beginning marquee

I measured out where I wanted the lights and took to drillin’

3-drilling marquee

You can see where I drew out the spacing for the lights a little better in this next picture:

4-drilling c marquee

…and the tools I used in this next one.  I already owned all of the tools so that didn’t cost me a penny!  I hit a snag while drilling the “K” which you can see there!  There is a structural wire on the inside which I thought I had avoided while spacing out the holes for the lights….but NOPE! That little snafoo wasn’t going to get me down…onward ho!

 5- drilling marquee with tools

Here it is with holes drilled:

6-marquee with holes pre paint

Then…it was time to get my paint on! Valspar Metallic gold on the inside. I already had the paint too from my last project…so more pennies saved!

7-pre gold paint marquee

8-gold paint marquee

Valspar Satin Black (3.99) on the outside:

11-marquee with holes before paint 2

12-black paint

Voila…paint is done!

 14-holes and paint 2

I attached lights from target.  It took 2 strings (13.99 each).

15-marquee lights install

Ooh La Loo! There she is!!

19-cake marquee

Standard
crafts, diy, gifts, upcycling, Yarn

pinterest party!


My college girlfriends and I got together this month for a pinterest party! I kept referring it to as a pinterest fail party….have you seen all the pinterest fail posts on social media? google it…they’re amazing.  Not to say that I didn’t have faith in us…but we were doing things we hadn’t previously tried so you never know!  Some of the girls chose pinterest baked goods while others chose craft projects.  I of course gravitated towards a craft.  I browsed my pinterest feed and looked for something that looked simple enough but still cute.  The first one I picked was linked to this site.  I’ve seen a lot of mason jar ideas in the past…but this one was too cute to pass up.  I deviated from the mason jar and went with jam jars.  Ideally you would use jars that you have collected from home and re-purpose them but since I was providing jars for the whole group I had to pick some up.  I also needed plastic animal toys…I planned on stopping by a couple places but my first stop had everything I needed.  I went to Daiso, which is a $1.50 Japanese store, which carries virtually everything.  I’m not kidding!

Pictured: My Daiso basket (each item $1.50) compared to the price of plastic animals at Joanns!

IMG_9924  IMG_9926

Step One: Pick the animals you’d like to use

Step Two: glue those bad boys on the lids

  IMG_0018  IMG_0020

Step Three: Spray paint the lids and the jars a color of your choice

IMG_0047

These were the paints I had in my stash…we only ended up using the four pictured on the right

IMG_9934  IMG_9942

Here are more pics of the process.  For this one I did a two-tone design.

IMG_9936  IMG_9941

IMG_9938  IMG_0067

I removed the lid, covered the bottom with painters tape and painted the jars white…once I took off the paint I ended up with this two-toned look.  Ooh La Loo!

IMG_0075

Here are what all of ours ended up looking like!

IMG_9972  IMG_9965

IMG_9975  IMG_9951

Bekah found the next pinterest project from this site.

I embellished my trees with items in my craft stash: pipe cleaners, brads, and mini pom poms.

IMG_0062  IMG_0082

Ooh La Loo! So cute up on the bookcase in my living room.

IMG_0086

One more craft project found here.  I think I’ve mentioned my crazy yarn stash in a past post.  It came in handy for this project!

IMG_9929

They turned out cute…I think I’ll make some for my friends for Christmas!

IMG_9963  IMG_9960

Here’s our lovely host Alyssa! She made a goat cheese heirloom tomato tart! Yum!!

IMG_9943

Standard
collabo, crafts, diy, fabric, Sewing

collabo post: matryoshka dolls

It’s not very often I get to see all of my college besties…we’ll that’s not true.  We seen to get together more than you would think seeing as how spread apart we are.  My lovely Laura lives all the way in PA and made a special pit stop in LA on her way yo a wedding in Santa Barbara, our college town.  I got her all to myself for an entire afternoon.  We had chocolate chip pancakes at the Original Pancake House, cookies at Torrance Bakery, discovered a new vintage shop, and hit up one of my favorite fabric shops Momen +.  She got the Torrance tour it seems.  While at Momen, Laura found the cutest little hand made elephants…she couldn’t resist them for her sweet baby girl’s room.  She got a free “fat quarter” with her purchase.  She thought she could make something cute with this pattern…we put out heads together and came up with these little stuffed dolls.  SO easy to make!

IMG_9443Here’s the cute martyoshka fabric!

IMG_9444We cut out the individual dolls.

IMG_9510  IMG_9511
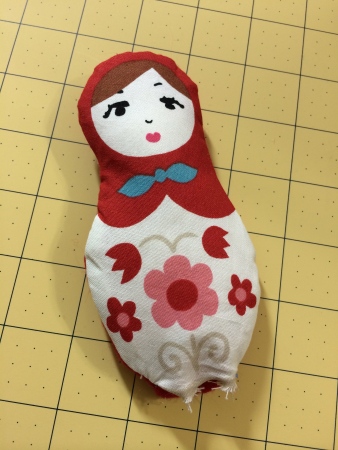
Pick a coordinating fabric and trim around the doll.

IMG_9513Sew a tad bit away from the doll outline.

IMG_9516You can get a feeling for the seem allowance in this pic.  Keep an opening where you can flip the fabric right side out.

IMG_9518After you flip it…press it…stuff it…and hand sew the hole

IMG_9507  IMG_9508Here’s an example of why you DON’T sew right up to the edge…..the doll looks super skinny once you stuff!

IMG_9520Laura loo gave the machine a whirl too!

IMG_9533Here are the ones we finished that afternoon…can you spot the first two we made…lol!

IMG_9536Ooh La Loo!

Pretty cute huh?

Standard